Dynamic Web View of a SharePoint List Item using Excel Web Access Web part
Sometimes customer would like to see the SharePoint list item with a specific design instead of default view for which developer develop a app or web part to achieve it.


But in this example, I will show you how to create a dynamic web view of a SharePoint list item using Excel Web Access Web part.
Imagine a customer requirement is as below:
A State Government would like to start "Develop my Village" program for which they would like to gather information of all the villages(from each department) and store it in Database. After that they would like to view each village information in a village report card format and share it to Central government for review.
Let's follow the below steps to store the village information in a SharePoint list and view the SharePoint list item in a village report card format.
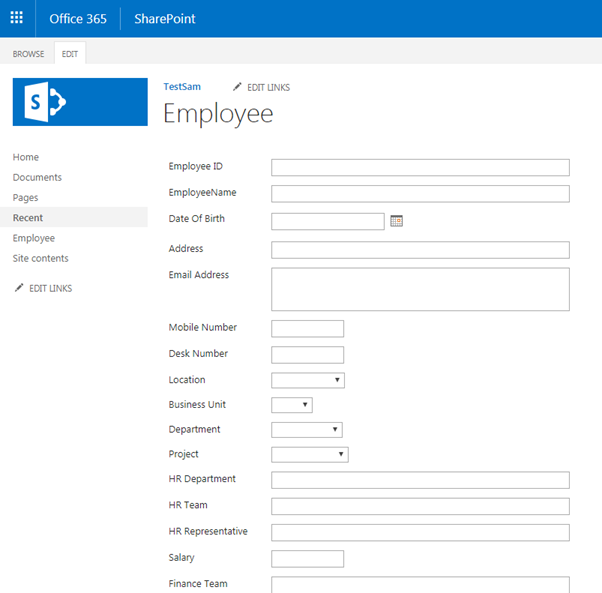
Step 1: Create a Village list in SharePoint site with set of columns.
Screenshot for your reference:
Screenshot for your reference:
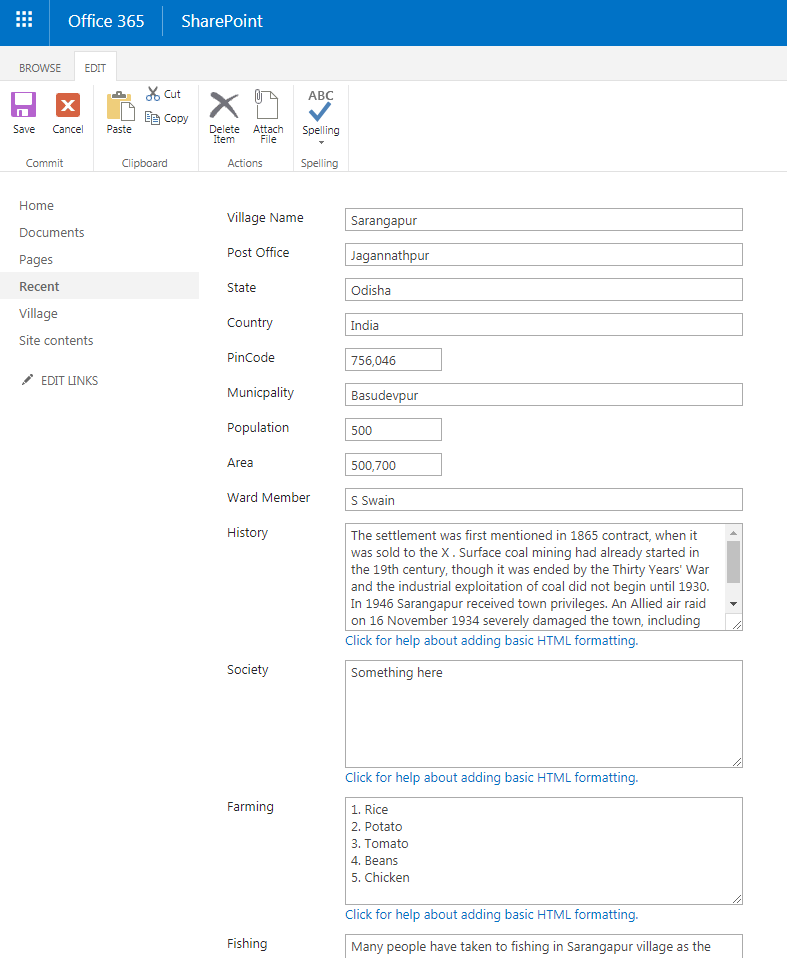
Step 2: Add a New Item and fill a village information.
Screenshot for your reference:
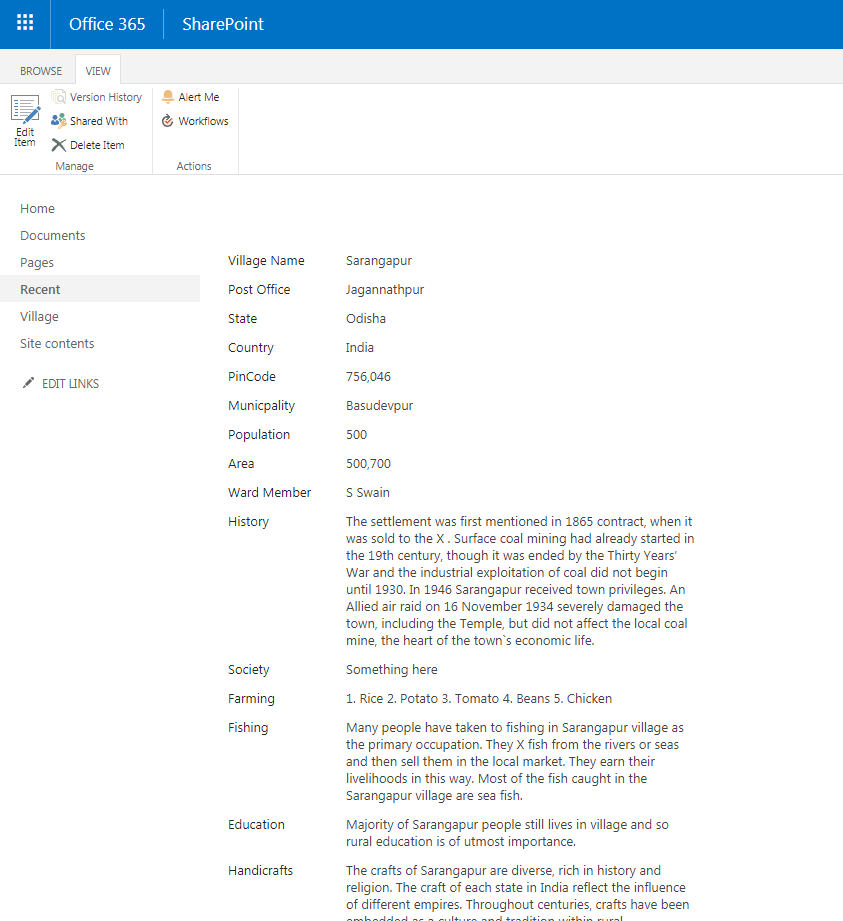
Step 3: Once list item is created, click on view item to see the default SharePoint list item view.
Screenshot for your reference:
Step 4: Now instead of seeing this default SharePoint item view, Government would like to see the list item as below design(which they call it as Village Report Card).
Sample Design Screenshot for your reference:
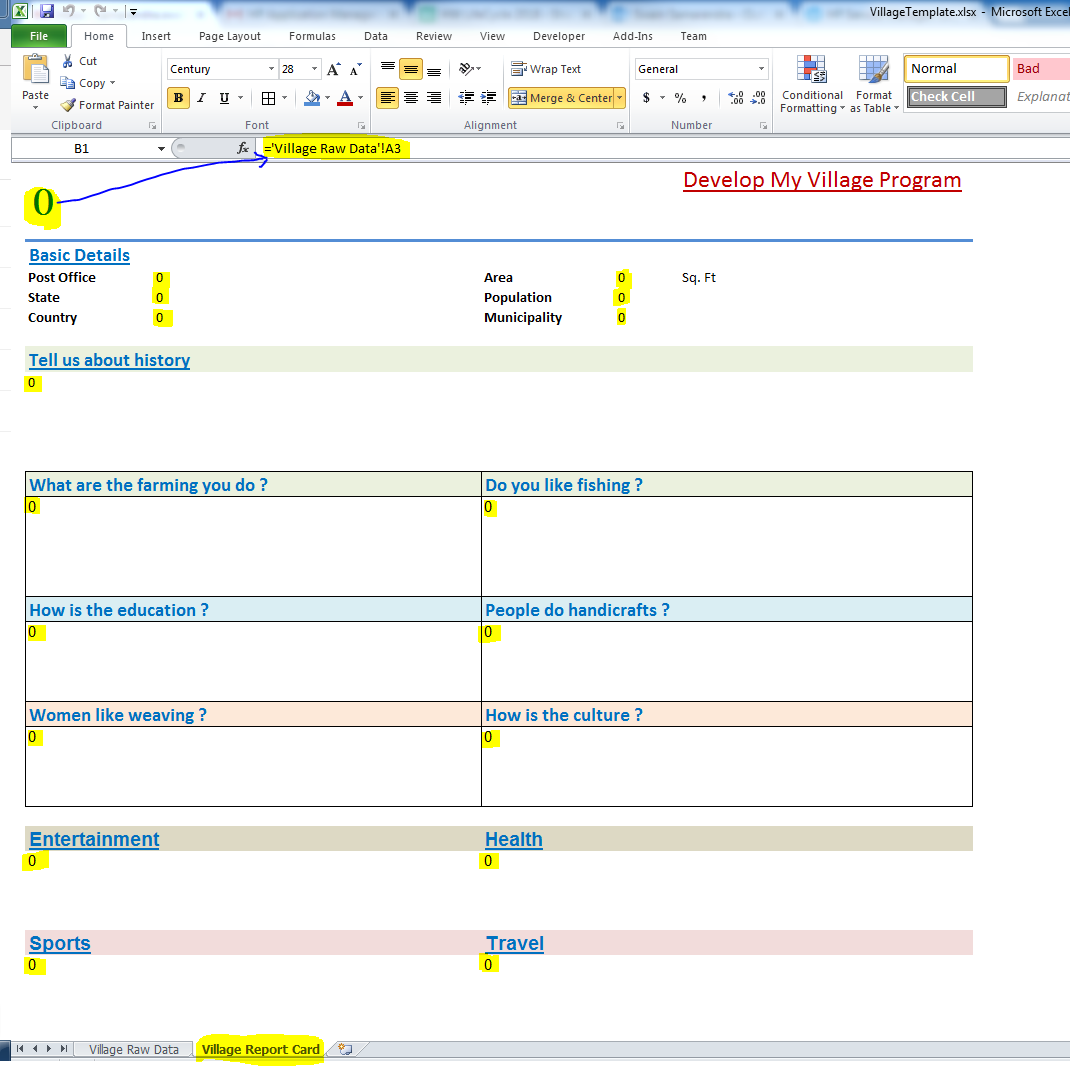
Design a similar design of Village Report Card Template in Microsoft Excel. Please click on this link to download the sample excel template(VillageTemplate.xlsx).
- Open Microsoft Excel.
- Rename the 1st two sheets to Village Raw Data and Village Report Card and delete the last sheet (Sheet 3)
- Open Village Raw Data sheet.
- Select 26 columns - click Insert Tab - click on Table to create a table. In this example, 26 referred to store 26 columns information from the Village list.
- This time, select the same 26 columns and 3 rows and then put a name to the table range. In this example name of table range is 'VillageRecords'.
- Now click on Formulas Tab - Click on Name Manager - Verify the name of table range is "VillageRecords".
- Then just imagine, 2nd row of this table range will contain the village list column names and 3rd row will contain the respective column value.
- See below screenshot for your reference:

- Now open Village Report Card sheet and design the sheet as per your requirement.
- Map the value from Village Raw Data sheet.
- In this example. I have mapped all the column information from Village Raw Data sheet.
- See below screenshot for your reference.
Step 5 : Once the Village Report Card excel template design is ready, save the template file and upload it to a document library.
Step 6: Open the village list view item page(DispForm.aspx).
Example of view item page URL: http://sam.shapoint.com/sites/testsite/Lists/Village/DispForm.aspx?ID=1
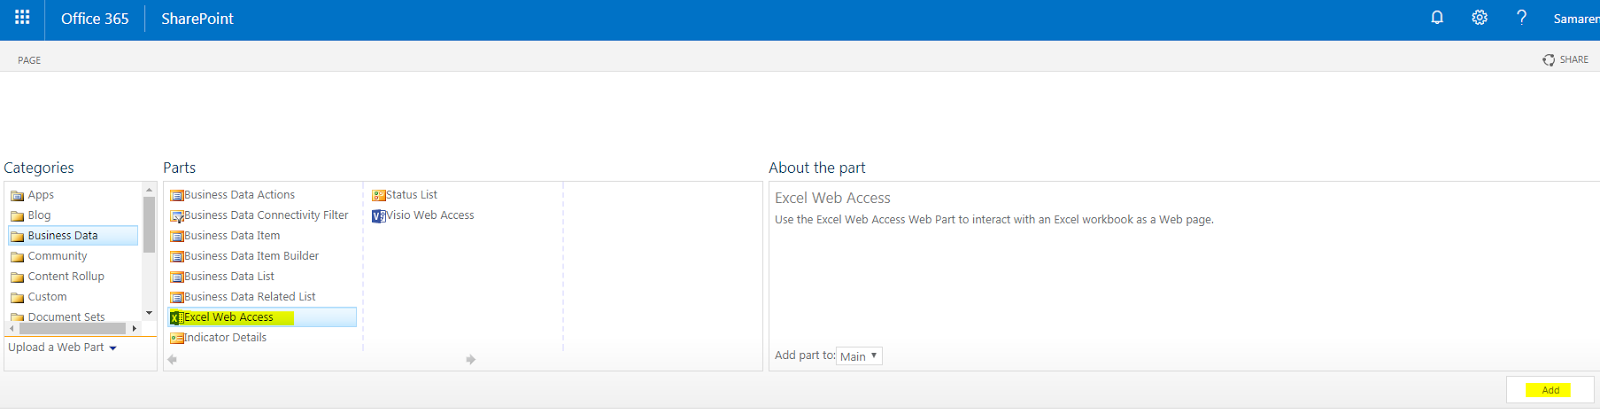
Add an Excel Web Access Web part to the page.
Screenshot for your reference:
Edit the excel web access web part and select the workbook (VillageTemplate excel file from the document library)
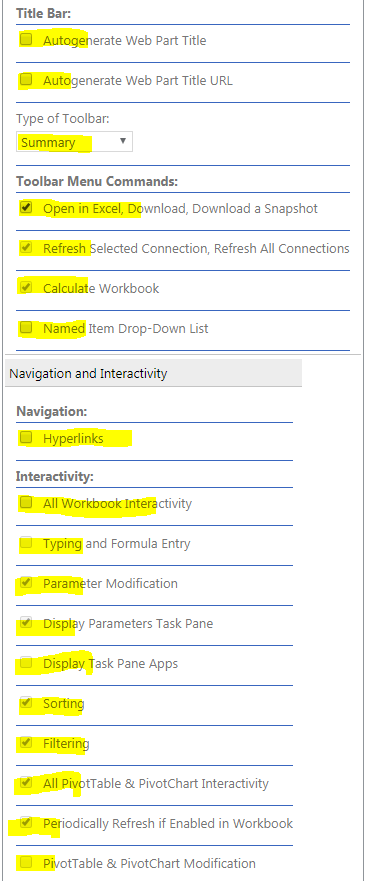
Disable and Enable the options as below in excel web access web part.
Screenshot for your reference:
Set the height, width and chrome state in excel web access web part.
Screenshot for your reference:
Click Apply in excel web access web part.
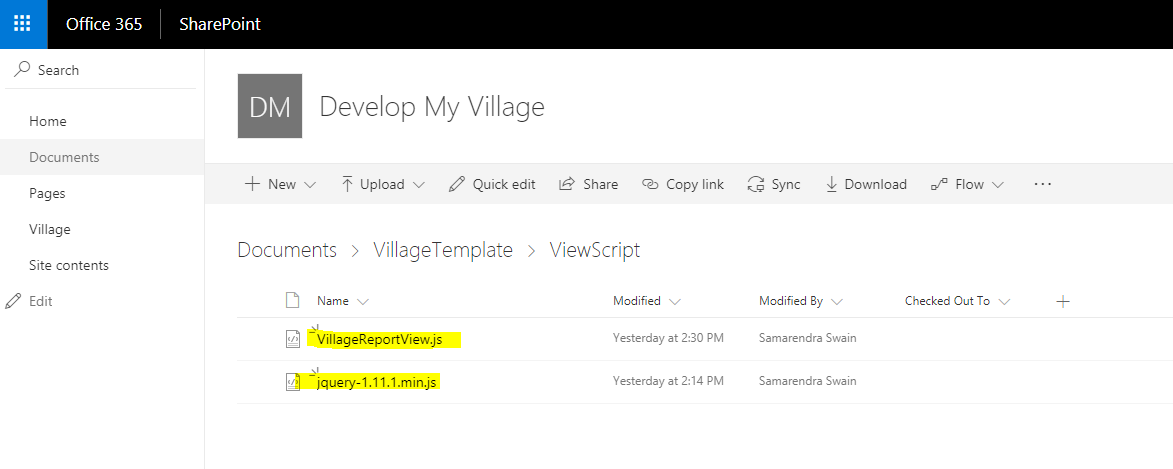
Step 7: Create a JavaScript file to read the list item column name and corresponding column value based on All Items list view. Please click on this link to download VillageReportView.js and jquery-1.11.1.min.js file.
VillageReportView.js
- In this file it will read list item based on item id from the browser. For example ID from the browser url: http://sam.shapoint.com/sites/testsite/Lists/Village/DispForm.aspx?ID=1
- The idea is to read the All Items list view is to read the column names and their positions. Means it will write the column names in the same order in the 2nd row of Village Raw Data sheet in VillageTemplate excel file.
- Then it will write corresponding column values in the 3rd row of of Village Raw Data sheet in VillageTemplate excel file.
- Then it will show the Village Report Card sheet in Excel Web Access web part.
Screenshot of All Items list view for your reference:
Upload VillageReportView.js file and jquery-1.11.1.min.js file to SharePoint document library.
Screenshot for your reference:
Open VillageReportView.js file and change the below marked values(if required) and save it.
- Change the jquery-1.11.1.min.js file url.
- Change the Site url.
- Change the Village List name.
- Change the Village List GUID (Get the List GUID from list settings page url)
- Change the All Item list view GUID from Village list (Get the list view GUID from list view page url)
Screenshot for your reference:
<script type="text/javascript" src="/sites/testsite/Shared%20Documents/VillageTemplate/ViewScript/jquery-1.11.1.min.js"></script>
<script type="text/javascript">
$(document).ready(function () {
SP.SOD.executeFunc('sp.js', 'SP.ClientContext', function () {
ViewVillageReport();
});
});
var siteUrl = "https://sam.sharepoint.com/sites/testsite";
var VillagelistName = "Village";
var VillagelistGuid = "F30508DD-A524-4F7C-A53B-9B1AC9C95F94";
var VillagelistViewGuid = "64FE8DC2-5462-4C85-9AF2-EE0D6938B0A7";
var ExcelTemplateSheetReportName = "Village Report Card"; // Optional
var ExcelTemplateNameRangeName = "VillageRecords"; // Optional
Open the village list view item page(DispForm.aspx).
Edit the DispForm.aspx page and add a content editor web part.
Screenshot for your reference:
Example of view item page URL: http://sam.shapoint.com/sites/testsite/Lists/Village/DispForm.aspx?ID=1
Screenshot for your reference:

Edit the content editor web part and type the url of "VillageReportView.js" file and Click Apply.
Screenshot for your reference:
Then click Stop Editing the page which will redirect to Village List All Items Page.
Step 8: Select the village list item and click on view item.
Screenshot for your reference:
Now it will show list item in the design format in DispForm.aspx page.
Screenshot for your reference:
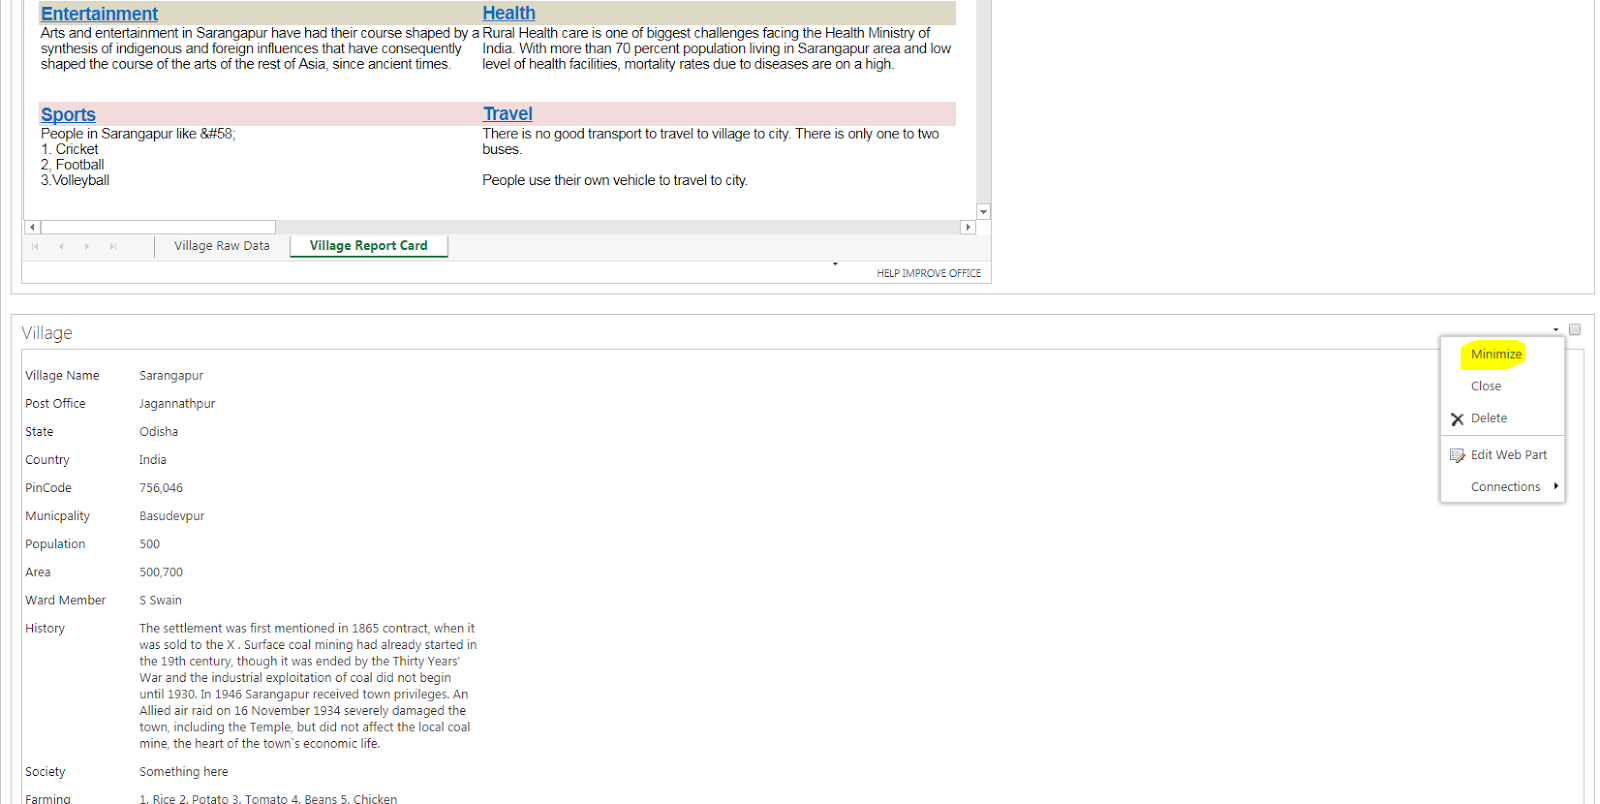
Step 9: You can still see the default SharePoint view under this custom view.
You can minimize the list item view web part.
Screenshot for your reference:
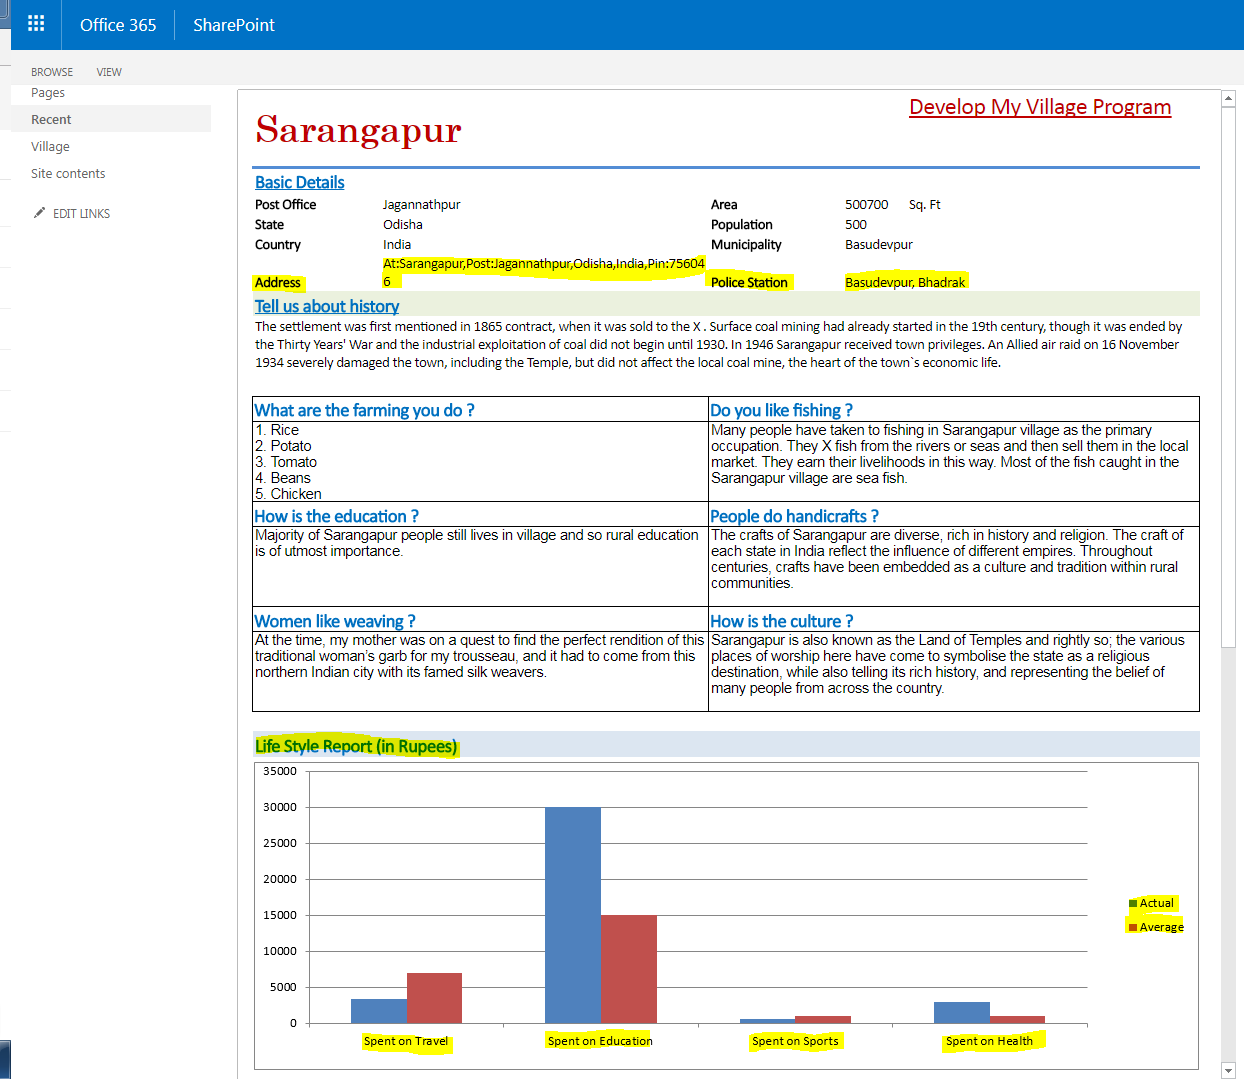
Step 10: Time to time if customer would like change the design of this view, then you just need to change the design in the excel template and upload it to document library.
In this example, we will map few more columns and add a Life Style chart based on raw data from Village Raw Data sheet.
Screenshot for your reference:
Save the excel template file.
Upload this new file and replace the old excel template file in the document library.
Step 11: Open the list item to view the latest design.
Screenshot for your reference:
Additionally you can print the village card report and save it as PDF file.
Screenshot for your reference:
Here is the PDF view.
Screenshot for your reference:
Hope this article helps you to view the SharePoint list item based on the design template you need using excel web access web part without writing code again and again.
Comments
Post a Comment