Customize SharePoint List form into Wizard style
In this example, we will create a list and show the list columns in a wizard style.
Follow the steps.
Step 1. Create an Employee list with the set of columns. I have created 24 columns to show them in 6 steps in a wizard.
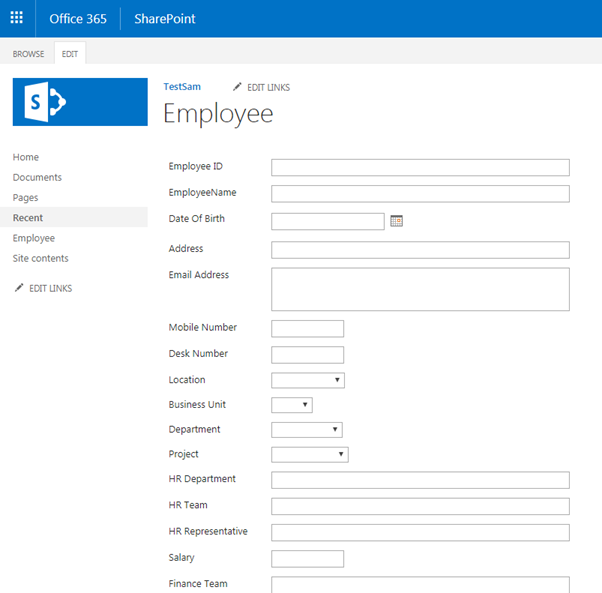
By default, If you click on the new item in the Employee list, the web form looks like below.
Screenshots for your reference
Step 2. Enable content type in Advanced settings in the Employee list.
Click on Item content type and then click on Column order to set the position of each column to show in the right position in the wizard.
In this example, I have created 24 columns to show them in below 6 steps.
- Employee: Basic Details (Contains 8 columns)
- Employee: Project Details (Contains 3 columns)
- Employee: HR Details (Contains 3 columns)
- Employee: Finance Details (Contains 3 columns)
- Employee: Insurance Details (Contains 4 columns)
- Employee: Passport Details (Contains 3 columns)
That means as per the column order, step Employee: Basic Details will show 1st 8 columns, then step Employee: Project Details will show next 3 columns, then Employee: HR Details will show next 3 columns and so on.
Screenshots for your reference

Step 3. Prepare the below JS and CSS file. Please click on this link to download zip file(SharePointListFormWizardStyle.zip) containing the below files.
- EmployeeFormWizardStyle.js (Custom file)
- jquery-1.11.1.min.js (Generic file)
- query-ui.css (Generic file)
- jquery-ui.js (Generic file)
Create a folder(WizardStyle) in a document library and upload these files.

- jquery-1.11.1.min.js
- jquery-ui.css
- jquery-ui.js
Screenshots for your reference

Screenshots for your reference

Also if you would like to change the number of columns to show in a specific step in the wizard, change the size in the EmployeeFormWizardStyle.js file.
Screenshots for your reference

Save the EmployeeFormWizardStyle.js file and upload to document library.
Step 4. Click on New Item in Employee List which will redirect to /sites/TestSite/Lists/Employee/NewForm.aspx page. Edit the page and add a content editor web part.
Screenshots for your reference

Step 5. Get the URL of EmployeeFormWizardStyle.js file from document library and type it. Then click Apply and stop Editing.
Example of file URL: /sites/TestSite/Shared%20Documents/WizardStyle/EmployeeFormWizardStyle.js
Screenshots for your reference

You can click on Next and Previous button to navigate betweeen steps in the wizard.
Screenshots for your reference

Click Next

Click Next

Click Next

Click Next

Click Next

Step 7. Now if you would like to see the same wizard style design in EditForm.aspx page, follow the Steps 4 and 5 in /sites/TestSite/Lists/Employee/EditForm.aspx page.
Then you will see the edit form of an existing item as below.

Click Next

That's all!

Comments
Post a Comment